I love parties and I like to go the extra mile when it comes to all the little details of the party. I also like to be environmentally-conscious wherever I can. So I thought I’d share with you how to make a drawstring bag for your party guests to take home. Of course, you can also use these bags for a million other things as well: storing toys, make-up, hair-ties, as library bags, swimming bags – they are handy for everything!
By Emma from Frog, Goose + Bear
Getting the kids to make a drawstring bag is also a great way to teach them basic sewing. I hope my instructions below take all the work away from you and the kids can get busy on their own. You’ll soon find that they are addicted to making cute bags for their friends and family. You can simply never have enough drawstring bags in your life!
How to make a drawstring bag
The beauty of being able to make a drawstring bag is that you can make them the perfect size. So they’re great for gifting obscurely shaped things, and when it comes to parties, there is also the added bonus of the bag being a gift in itself. There are more complicated ways of making drawstring bags, but this is my quick and simple , no-fuss version.
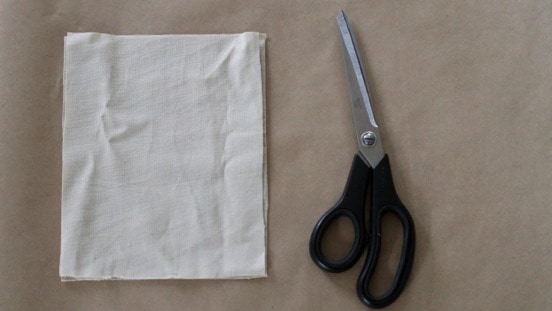
You will need
- Cotton fabric
- Thread
- Fabric scissors
- Sewing machine
- Iron
- Ribbon or string
- Safety pin
- Fabric paint or ink for stamping (optional)
What you need to do
1. Cut your fabric into two small rectangles of the same size. How big you want the bag to be will depend on the size of the goodies you intend to put in the bag.
2. Sew the two pieces of fabric together. If you are using a patterned fabric, you’ll need to have the underside facing outwards when you sew them together.
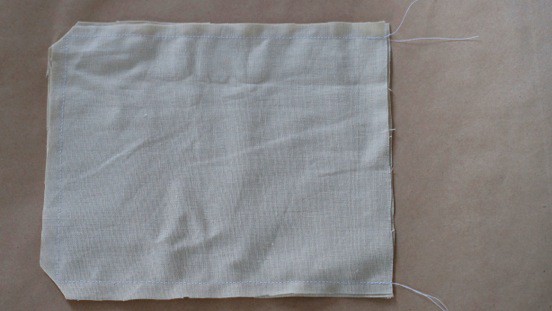
Give it about a 1cm seam allowance and start at the top. Stitch back and forward a couple of times to reinforce the seam and then sew around three sides of the rectangle. Finish by reinforcing the end of the stitching by once again sewing back and forward a couple of times.

3. Trim the fabric from the bottom two corners. This will make the corners nice and pointy and not bunched up when you pop the bag the right way around.

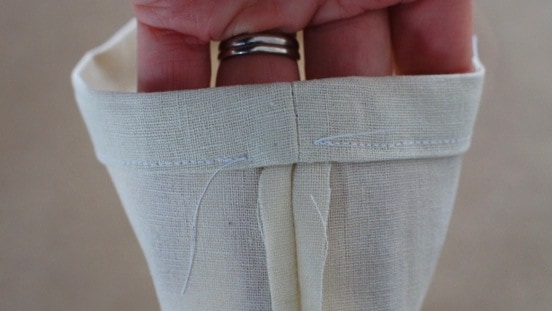
4. Fold the opening of the bag down about 1cm using an iron. Make sure it is nice and even the whole way around.

5. Fold the opening down one more time using an iron. You might like to make this fold a little larger, depending on the width of the ribbon or string you intend to thread through it later.
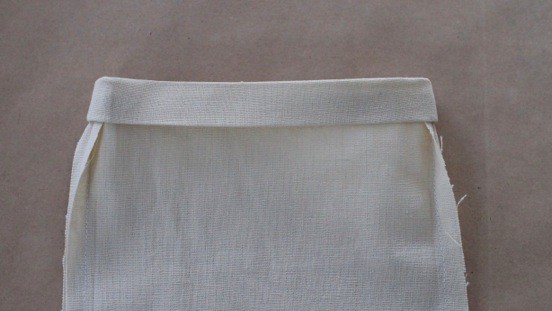
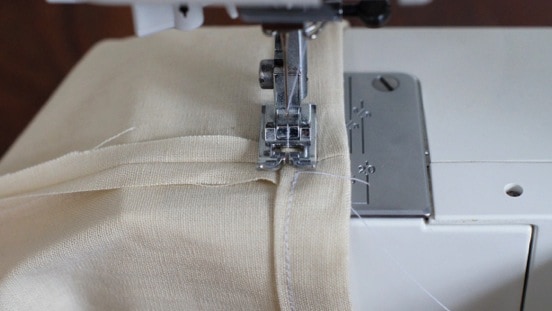
6. Sew around the bottom of the folded edge. Begin at the edge of one of the seams, reinforce the stitching by sewing back and forward a couple of times and then continue sewing all the way around the bottom edge of the fold. Stop approximately 1cm before you reach the beginning of your sewing. Reinforce the stitching by sewing back and forward a couple of times at the end before you finish.
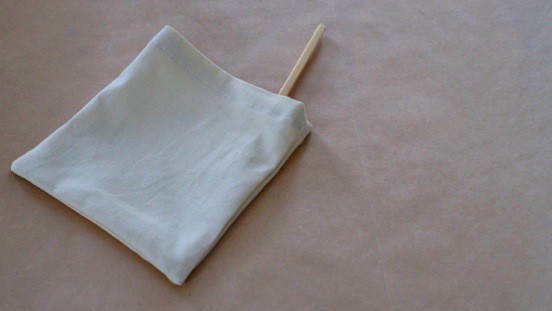
7. Trim the threads and flip the bag the right way around. I like to use a chopstick in the corners to make them nice and pointy.
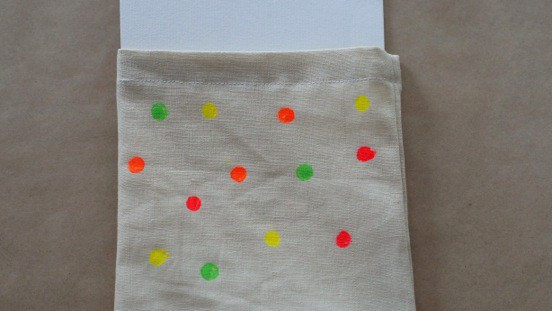
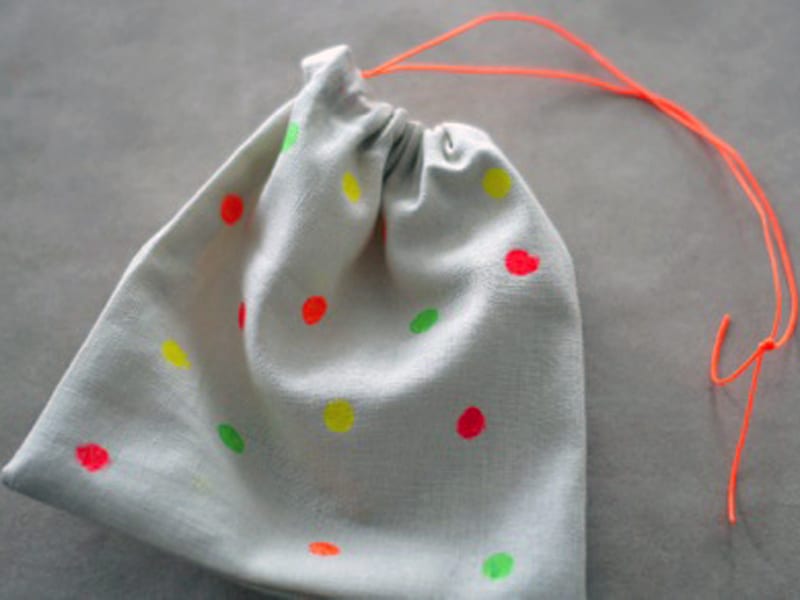
8. Decorate your bag. You might like to leave your bag plain, particularly if you have used a patterned fabric, but I decided to decorate mine to brighten it up a little. The options for embellishment are endless, for example, sewing or ironing fabric letters or shapes onto the bag. Using ink stamps or fabric markers also works really well.
I used fabric paint on the heads of drawing pins to stamp colourful dots on my bag.
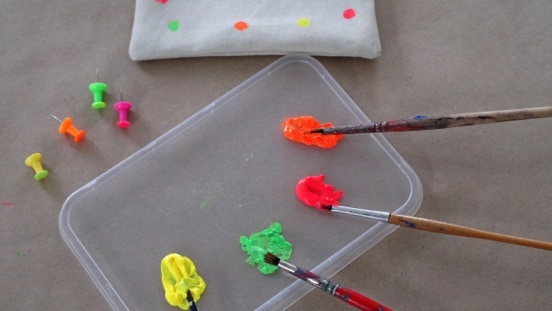
Remember if you are using fabric paint, you will need to put a piece of card inside the bag to prevent the paint going through to the other side of the bag.
9. Once your paint has dried, you can now thread your ribbon or string through the top of the bag. The easiest way to do this is to attach a safety pin to the end of your ribbon or string and thread it through the opening that you left at the top of your bag.
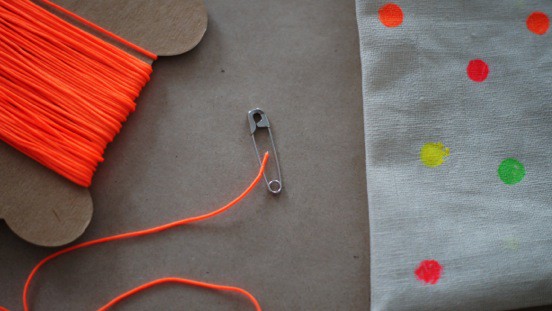

Once you have brought the ribbon or string back through the hole, you can cut it to size (leaving plenty of extra to allow it to hang on a wrist) and tie a knot in the end to secure.

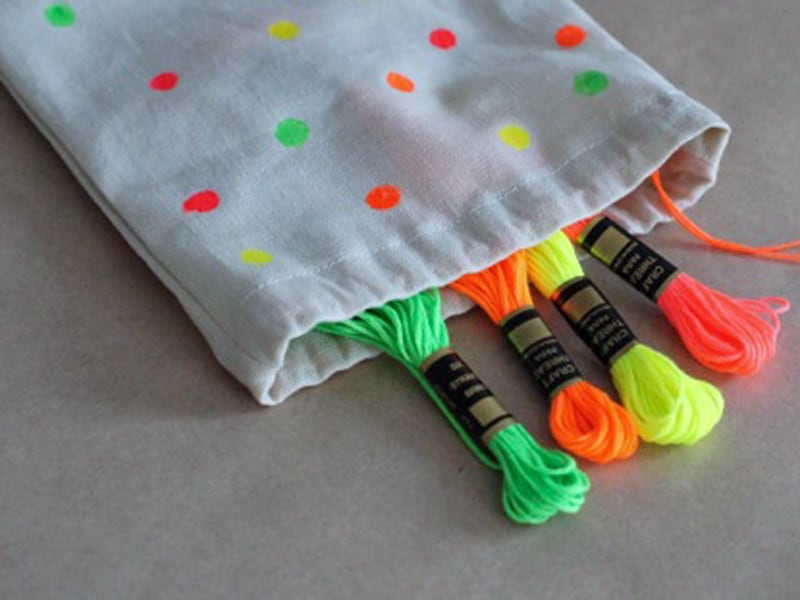
10.Now you can fill your bag with goodies. If you are using these as party bags, this is where you can get creative. Party favours don’t always have to be lollies. In this case I thought the supplies for making friendship bracelets might be fun with some brightly coloured embroidery thread, a roll of fluro tape, a safety pin and an instruction sheet.
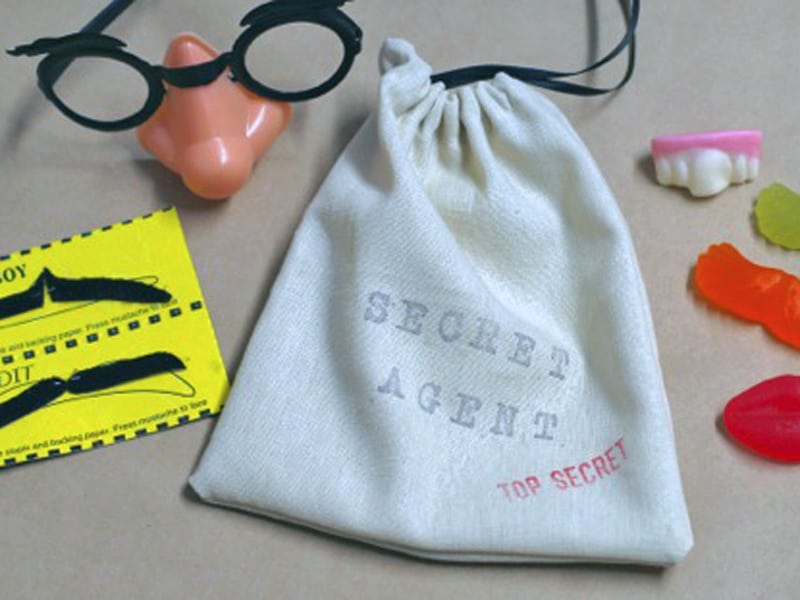
These secret agent bags were for my son’s spy themed 7th birthday party, which we used alphabet ink stamps to decorate.
You could also choose a patterned fabric to match your party theme like in the example below where I used some transport fabric with some small toy cars as the party favour. I can imagine party bags made with dinosaur fabric with toy dinosaurs inside, pirate fabric filled with chocolate coins or sparkly fabric with handmade beaded jewellery.
Once you’ve learned how to sew a drawstring bag, why stop at parties? You can use this same method to make all sizes of bags for storing jewellery, toys, shoes…. whatever you need.
How do you rate your sewing skills? Are you ready to make a drawstring bag now?